Thursday, February 27, 2014

Summons by the Numbers

With the jungle creeps fully analyzed, it’s time to take a close look at the various player summons. From Broodmother spiderlings through Warlock golems and to Shadow Shaman wards, the units here are varied and versatile.

For readability, I split the summons into several categories. First are the major pushing creeps:


As all units featured here have points of interest, I will analyze them in order.

The Broodmother spiderlings have very interesting damage type split. The Spiderites are perhaps the best unit to attack towers with – it is easy to get huge numbers of them up, and they deal almost as much damage to towers as their larger counterparts. At the same time, the Spiderlings can make more spiderites and deal 2.5x damage to heroes and lane creeps.

Mother Comes


Enigma Eidolons are incredibly powerful units all around, and just the normal 3-spawn does some of the heaviest damage around. If the Enigma player is able to bring them to split, the 6 Eidolons essentially outclass everything else in the chart for pure damage.

Then there are the Lycan wolves. With low BAT and their crit calculated in, their damage against tougher enemies outclasses everything else. More specifically, they deal the absolute most damage versus Roshan, and are some of the top pushers.

You ever feel bad for the big guy?


Prophet treants are nothing to write home in terms of damage – but I doubt that would surprise anyone. As always, they serve as a fantastic damage sponge and body blocking unit.

Necronomicon Units are the last in this list, and they bring forward great damage of their own. Paired up, the necro 3 is one of the best pushing options. On their own, the Necro warrior does heavy damage to all targets, burns heroes’ mana and does solid building damage; the Necro Archer does absolutely insane damage versus lane creeps, supports with the haste aura and features the active mana burn.

Next up, I prepared a separate list for other major summons that don’t quite fall under the pushing category:


As you can see, this list is full of special rules.

The Beastmaster boars are nothing special in terms of damage to anything but lane creeps, but they do feature one of the best slows in the game – a reliable, long-lasting, bkb-piercing movement AND attack slow. The greater boar is about 2.5x more effective at slowing than Venomancer is with his poison.

I'M HELPING!


Undying zombies are great, simply because of the great numbers they spawn in. If you are able to achieve the Deathlust effect, the zombies will truly turn the fight around – the damage goes up by 50% and the stacking slow can bring heroes down to a crawl.

Veno Wards deal surprisingly good damage, given how cheap and spammable they are. A single lvl4 ward deals about the same as a Greater Boar while applying a similar poison; but it’s easy to have up to 8 wards shooting at once.

Then, we have the Warlock golem. To explain the numbers there are separate calculations for physical damage (black) and magical damage (red) dealt per 10 seconds. The magical damage is applied at 100% to all creeps, and at 75% to heroes. The magical damage is not dealt to buildings so it’s not calculated there.

There is a common stereotype of the late game Warlock dying, and then collecting an Ultra Kill or a Rampage; it’s easy to see why. While the level 1 golem is powerful enough, a level 3 golem deals incredible damage. The golems’ damage is a bit deceptive, as it’s split into three parts – their physical attack is a relatively weak Chaos-damage attack, but each hit has a 60% of proccing the Flaming Fist which deals a large amount of magical damage in a small area (300 full splash, 350 half splash). Furthermore, the Golems burn everything around them by simply existing (250 radius). And seeing as both the passive and active magical damage effects stack, it’s no surprise that adding additional golems increases the power greatly. The 4 golems that the Warlock is able to potentially spawn simply deal more hero damage than anything else in the game; in essence, the 4 golems deal 690 damage per second to any hero unfortunate enough to be in their reach. This is roughly the equivalent of being zapped with a level 3 Lion’s ultimate every second (637 damage after magic resistance).

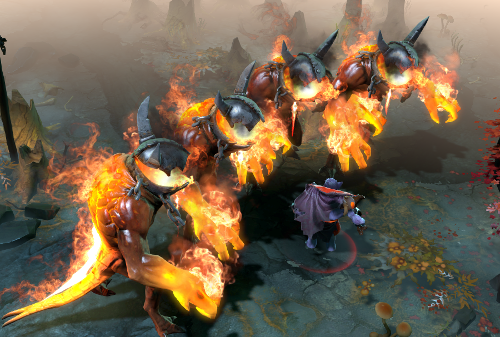
To Hell... with that


Next up, I will be examining individual, more complex summon cases. 

First up are the Visage summons:


I was surprised by the decent damage the Familiars are able to deal even without their stacks; the 10 damage they deal is deceptive, as they use one of the best damage types in the game and have a stellar BAT of 0.4. This of course changes dramatically if the familiars can have full stacks. The familiars attack 2.5 times a second, and 7 max stacks means they are able to deliver the bulk of their damage over the course of 3 seconds. This also shows why -armor items are so effective on Visage – the physical burst damage benefits from the increase greatly.

"STRIKE FORCE FAMILIAR 1 COMMENCING BOMBARDMENT"


Next up are Invoker Forged Spirits:


I included both single 4/5/6/7 and dual 4/5/6/7 options. As you can see, having the 4 levels in both Quas and Exort is very important to Forged Spirit damage as the increase is massive; just leveling Exort to 4 damage increases damage by 19%; Quas at 4 increases the damage by 138% or a difference or 119%. Overall the forged spirits are great against everything that’s not towers. Their tower damage is decent, but they are outclassed by all other pushing options at a similar level.

Next is Lone Druid’s Spirit Bear:


This case is a bit more complex, as technically speaking all of Syllabear’s skills increase bear’s damage. Notably though, Synergy has a more significant impact on raw damage than bear levels do. In fact, even Rabid (not included) has a greater early game benefit than bear ranks; When active, Rabid increases attack speed by 10% per level and thus bear’s damage by 10% per level . This however decreases in effectiveness as the bear purchases attack speed items. Bear ranks are important for the skills they grant – return at 2, roots at 3 and demolish/magic resist at 4. My experience with Lone Druid is limited, but it is worth knowing that Synergy is between 5x and 2.5x better than bear levels for raw damage output. Arguably, bear level 4 should only ever be picked up when you are able to push towers. Before that, every other skill outdoes it in damage potential.

Bears are hard


Next up are Shadow Shaman Mass Serpent Wards:


A different kind of summon, they are immobile but are able to dish out an incredible amount of damage very quickly. Shadow Shaman himself is able to disable units for 8.5 seconds, which really shows the strength of the ward trap; it’s easy to achieve the shown 10 damage potential. Aghanim’s Sceptre is an incredible upgrade for Shadow Shaman, increasing damage by whopping 93%/75%/75% by rank. Late into the game, if you need pushing power, Aghanim serpent wards (perhaps with a refresher) are your absolute best option.
The Serpent Wards also have a special rule for AOE. The range is limited, but they do have a varied splash. They deal full splash in 50/75/85 radius from impact (average melee range is 128); 40% splash damage is dealt in 75/100/110 radius and 20% splash is dealt in 150/200/220. It’s not much, but with their great damage, clumped up targets are in for a lot of pain.

I STRIKE YOU WITH THE POWER OF A THOUSAND SUNS!


Last up is Witch Doctor’s Death Ward. As it only deals damage to heroes, that is the only number shown:


As you can see, the Ward is able to dish out incredible damage over its duration of 8 seconds. The Aghanim upgrade provides extra 50%/33%/25% damage but also provides 4 target bounce. If you get the chance for a full channel, very few teams can survive 4800 damage over 8 seconds to each hero – or 600 damage per second. Notably, even if you can channel it for a few seconds, the ward remains powerful. You deal 240/360/480 damage per second without a scepter, and 360/480/600 damage per second with a scepter. In essence, you are bombarding the enemy with a Visage’s Soul Assumption every second.

Musical demonstration of 4800 team damage. Draxter also made it a mod here.
Not my video, but the creator is awesome.
And that is all! Thank you for reading this long list, please let me know if I got anything wrong or you would like more information.

Thursday, February 20, 2014

Just How Tough Are The Creeps?


The second aspect to consider when it comes to jungle creeps is just how tough they are. This matters for a few reasons – how quickly can you kill them? How well with they hold up against other creeps? And how tough will they be when a Chen or an Enchantress or anyone with a Helm of the Dominator takes over? Well, let us have a look.

First, we have the Small Camp.


As expected, the small creeps don’t post much of a challenge to either heroes or the creeps. However, the small camp is the only place where units with Medium armor are found. Medium armored units are much more durable against towers and ranged creeps; more on that soon.

The Medium Camp:


Centaurs remain a standout here, as also seen in the damage charts. Also notable are the Ogres and the Golems – golems are a famous favorite of Naix, because of their great health pools; Ogres however have even more health amongst them, do barely more damage, and have less armor. Something else the Naix could use to salve himself up.

Next is the Large Camp:


As expected, the various large creeps are the hardest to kill – whether it’s by heroes, creeps or towers. Interestingly, the smaller Hellbear is actually noticeably tougher than its bigger cousin – or the Satyr Tormentor, for that matter. You can also see that armor makes a noticeable difference to the creep’s health.

Lastly, here is what the Ancient creeps look like:


Not much to note here, really. Ancient creeps are big, tough, and have a sizeable bounty on their heads. Do remember that the Black Drakes are not magic immune. They still resist many effects, such as Holy Persuasion, but they will take damage from all spells.


Here is a complete chart, with the least significant creeps removed for brevity:


Overall, the Centaur is the toughest creep in the jungle. The high HP and the high armor really go a long way. I also added a side chart to show how the creeps are able to stand up against the various towers (as their damage differs). One thing of note is the various Medium-armored creeps are very durable against towers. More to the point, the Harpy Stormcrafter is actually able to take more damage from the tower than the Centaur or anything else!

Next up, I took the same chart and adjusted it for Chen’s level 4 Holy Persuasion health boost. The chart is sorted by survivability versus towers, as I believe that’s the main time the creep durability really comes into effect:


As you can see, the Medium Armor modifier really comes into effect here. The Harpy Stormcrafter is actually able to survive 40% longer against a tower than the Centaur! Medium creeps now become the best way to tank a tower; even the puny Kobold Tunneler is more survivable than most common creeps. The medium creeps do little to no damage against the towers, meaning you would still want to bring along a wolf or a dark troll summoner or a wildwing to dish out the damage. 

More on the same, additional armor really amplifies the survivability of creeps. Here is what the survival times look like for Chen-converted creeps with a Wildwing Ripper aura and Vladmir’s Offering aura:


As you can see, a Harpy Stormcrafter can survive an incredible 20 seconds against a T1 tower or 14 seconds against a T3/T4 tower – and this can happen relatively early into the game. This can go a long way to allow you to tower-dive heroes, or to quickly take towers without losing your key pushing ability.


All things combined, an ideal Chen/Enchantress pushing team would include a Harpy Stormcrafter, a Ghost or a Hill Troll Berserker to tank the tower; a Dark Troll Summoner to spawn skeletons to damage the tower, and either a Wildwing Ripper for more survivability or an Alpha Wolf for more damage.

Do remember that you need to control tower aggro to get the full benefit from the Medium creeps. They are mostly ranged, so you would want to bring them as close as possible to the tower. Furthermore, you might need to use aggro switching mechanics to keep the turret on the right target.

This concludes articles on jungle creeps. Going forward, I will be putting together similar articles for summoned creeps – such as Necronomicon summons, the Spirit Bear and Invoker’s Forged Spirits. Thanks for reading, hope to see you soon.

Wednesday, February 19, 2014

Post 1 Follow Up - Jungling Details

During the discussion that ensued, a few additional questions were raised in regards to jungling as related to non-Chen/Enchantress players. The first bit was in regards to how the jungle damage looks like in regards to jungling heroes. Here is what I was able to come up with (large):


This chart estimates the amount of damage a player would be taking from the various camps, to show their impact. The D1, D2 and D3 are the damage/10 of the various kinds of creeps in the camp. This really showcases the importance of killing the biggest creep in the camp ASAP as the damage usually drops by 50% or more when they die.


Second subject that was brought up was the question in regards to Stout Shield effect. I have revised the math since I put up the original chart for significantly greater accuracy. The new chart accounts for quite a few factors:

  • Included Vanguard for comparison
  • Included PMS; the numbers are identical to the Stout Shield
  • The damage block is governed by pseudo-random distribution, resulting in approximately 53% block chance for the stout shield/PMS and 66.7% block for Vanguard
  • Damage blocked is applied before any damage reductions from armor, which has a beneficial effect on final damage taken
  • Made the amount blocked be more realistic


Vanguard is not usually built for the purpose of blocking creep damage, but it has a dramatic impact on the amount of damage it’s able to block. This also illustrates precisely why the various large creeps hurt so much – their slow attack and chaos damage result in minimal damage reduction from what they are able to dish out.
While I was researching this, I discovered that stout shield is able to stack with itself with diminishing results. The final result of the blocking is approximately 83% chance to block 20 damage. Here is the comparison chart between 1 Stout Shield, 2 Stout Shields and a Vanguard:


Not sure if this will be relevant to anyone, but the damage reduction for very fragile junglers could be significant.

Thanks for reading!

Thursday, February 13, 2014

Jungle creeps by the numbers


Have you ever noticed that the various denizens of the jungle act differently? Their various abilities are common knowledge – armor aura on the big Wildwing, critical strike on the small wolves and so on. But what else can they do? Why does the Ghost camp annihilate lane creeps while kobolds sometimes fail to kill a single one? Why is the large troll camp not very threatening? There are differences between the various creeps, and I would like to present those to you.

The subject being examined today is damage type. This is a system that DOTA 2 inherits directly from the origin of Warcraft 3 engine. Regular lane interaction is fairly basic – heroes usually do regular/magical/pure damage, towers hurt and catapults do more damage to towers. However, DOTA 2 features a full system of damage type/armor type interplay and this can have noticeable effects in effectiveness of various creeps. There are five types of physical damage – Normal, Piercing, Siege, Hero and Chaos. There are also six types of armor – unarmored (lane creeps), light (unused), medium (most small creeps), heavy (large creeps, ancients, Roshan and many summons), hero and fortified (buildings). You can read about them here: Armor Type and Damage Type.


From what you will see in the lane, melee creeps deal normal damage that is effective against most targets; ranged creeps deal piercing damage that is only effective against other creeps; siege creeps deal siege damage that really hurts towers, and towers also deal siege damage that hurts most targets.

Things get more interesting once you dive into the jungle. Here is what the small creeps look like:


Before I go any further, all damage numbers will have accompanying bars. They represent the relative power of that particular creep against given type of armor amongst all creeps; This helps us spot any outstanding cases.

A few other basic concepts of note – all units have a Basic Attack Time, which is how long it takes the unit to deal damage once. Because the speed varies, all damage is averaged and then calculated over a period of 10 seconds.

In the small camp seen above, the only individually noteworthy creep is the Ghost; Ghost is a ranged unit that will absolutely devastate lane creeps. In the first 7 minutes, it will only take 12 seconds for the Ghost to kill a melee creep (6 for ranged). As a matter of fact, the Ghost possesses the second highest lane creep damage of all jungle options.

At the same time, the most damaging pull camp is the Vhoul Assassin camp – they are ranged units that deal a total of 927 damage to lane creeps every 10 seconds plus their mild poison. If you need to lose a creep wave, this is by far your best option.

Last noteworthy point from the Small Camp is that if you take over the Kobold Foreman, it is truly a pitiful unit that does less damage than an individual melee creep. Keep them out of combat so that you can get the most out of their aura.

Next up, we have the Medium Camp:


First and foremost, you can see that the Centaurs are truly an outstanding medium camp as the Centaur Conqueror does significantly more damage than anything else. At the same time, the Centaur does very little damage to towers.

Also, with their incredible 30% aura, the Alpha Wolf actually does the most damage to towers (with one notable exception you’ll see in the Large camp data). This is important as jungle creeps normally do relatively little damage to structures, and an enterprising Chen/Enchantress or anyone with a helm of the dominator can use the superior damage plus the aura to significantly speed up a tower push. Just on its own, the Alpha Wolf will deal 8% of T1 tower’s health every 10 seconds.

Next up, we have the large camp:


The most significant addition here are the Skeleton Warriors. They are small units that the Dark Troll Summoner is able to conjure up out of corpses. I feel they are mostly ignored by players, as they have tiny health pools and don’t seem to do that much. However, the skeletons have an absolutely fantastic BAT of 1 and come in pairs; two skeletons do significantly more damage than virtually everything else. In an ideal situation, just a pair skeletons can deal 47% of a T1 tower’s health over their short 40 second lifespan; four skeletons will do 24% of T1 damage over just 10 seconds.

The other outlier is the Dark Troll Summoner – while he does pitiful damage to heroes and towers, this guy absolutely annihilates lane creeps. If you need just one unit to push a lane with, he is your guy.
Other than that, the data here is predictable – the large creeps do more damage than any other options. To anything that’s not a tower, that is. However with the exception of the skeletons and the alpha wolf, they still do more damage to buildings than all other options. Of all the options, the Wildwing Ripper does marginally more damage to all targets.

To sum everything up, here is a chart consisting of only the notable creeps:


Notable in this case includes anything with decent damage, as well as anything with an ability that might be taken over by the player. Another factor of note are the various auras that could affect the creeps in question. Auras come in two flavours – attack speed increase, and damage increase. For our calculations, they are equivalent – both increase damage linearly, and relevant auras are already included in the numbers for the Alpha Wolf and Centaur Conqueror. For example, here is how the chart changes if you are a Chen or an Enchantress and have both a Centaur Conqueror and an Alpha Wolf under your control, as well as a Vladmir’s Offering:


As you can see, this has a major influence on the damage – in total, you see a 66% increase. (AS and AD stack multiplicatively; individually they stack additively; here, we have 1.15AS*1.45AD = 1.6675total bonus) Using this example, a Chen with an Alpha Wolf, a Centaur Conqueror, a Dark Troll Summoner and two skeletons would destroy a T3 tower in just 31 seconds without any damage from the hero himself or any other assistance. (Assuming none of the units die to the tower damage)

To draw a few conclusions, when jungling you need to watch out for the Hellbear Smashers, the Satyr Tormenters and Wildwing Rippers as those guys do by far the most damage. When pulling, Vhoul Assassins are able to almost completely destroy early creep waves with some help while all forms of Kobolds will do nothing. If using creeps yourself, the melee Large Creeps remain the best option for jungling overall. When pushing though, the Dark Troll Summoner is completely unrivaled due to his killing power versus lane creeps, and his summoned skeletons’ damage versus towers. Overall, if in doubt bring a Wildwing Ripper as they have a nice aura, nice HP and the best overall damage – plus their tornado ability can help you win a teamfight.


And that’s it for jungle creep damage. I plan to do a series of similar stats, covering jungle creep survivability as well as summoned creeps. Things like what the various Lone Druid skills do for the bear’s damage, how effective the various creeps are at tanking towers, and what does the absolute most damage when it absolutely, positively has to die. Thank you for reading, and don’t forget to ward!